GLab
Example #1
Topics
- Understand the geometry and establish workflow
- Symmetry
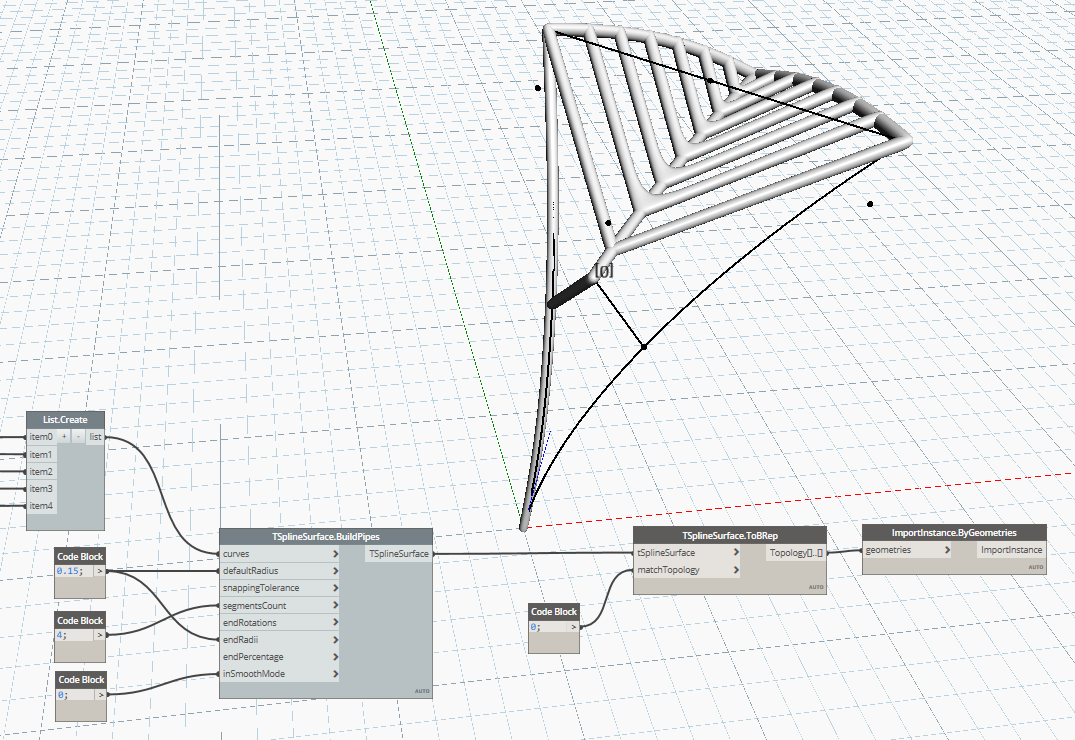
- TSpline (briefly)
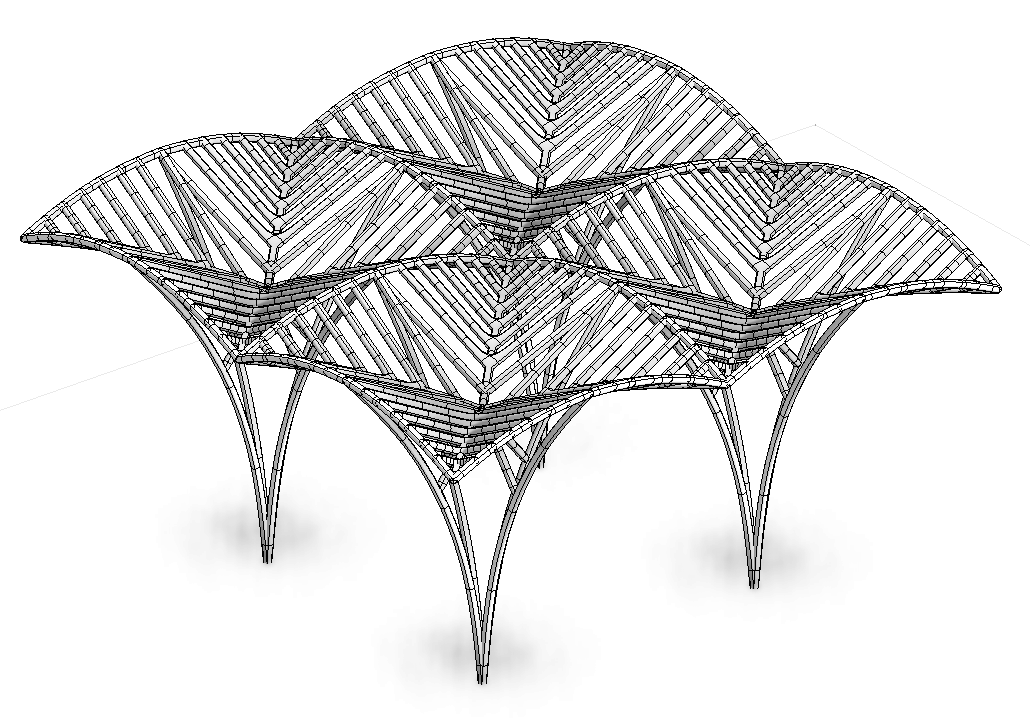
1. The basic elements: trunk and crown
Before diving into Dynamo we need to have a clear idea of each step required to build the final geometry. Looking at the image below we can immediately subdivide the structure in two parts: the column (trunk) and the crown. We can also notice that the structure is symmetric. This mean that we only need to create one column and a quarter of the crown to generate the rest.
The geometry of the trunk
The trunk can be represented by an arc by three points. The trunk is connected to the crown in two points and has one secondary branch.
The geometry of the crown
The crown is a square divided in 4 quadrants by 8 beams forming a star on plan. These beams are connected at the midpoint of the 4 arches forming the edge of the crown. Four additional arches (ribs) connect the edge corners to the centre of the crown.

2. Workflow
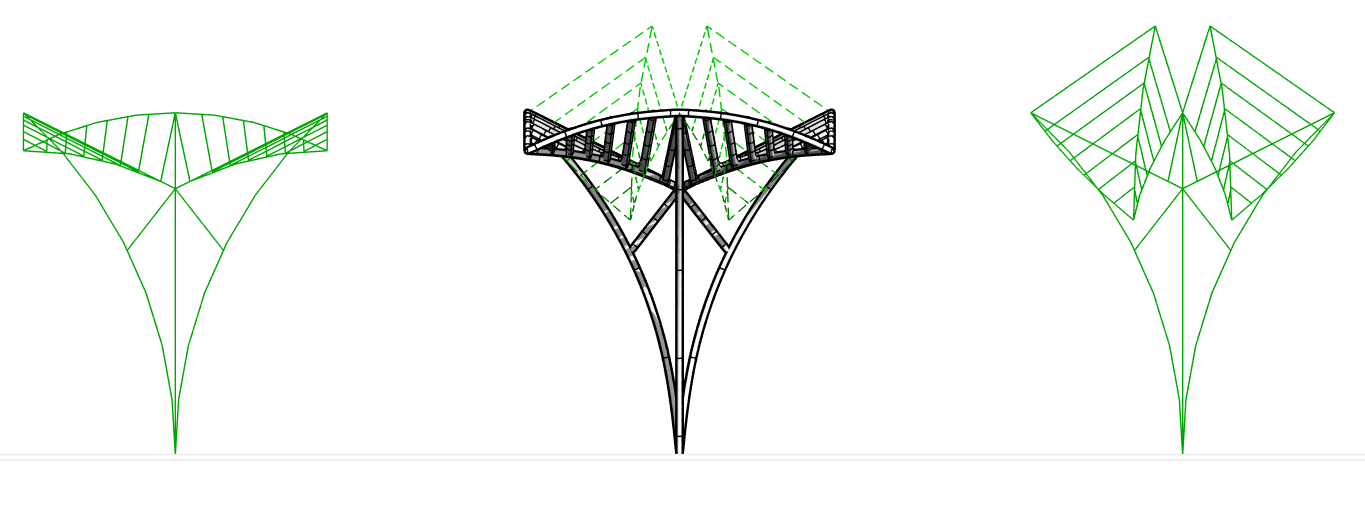
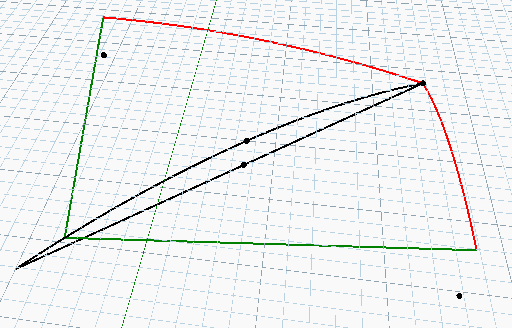
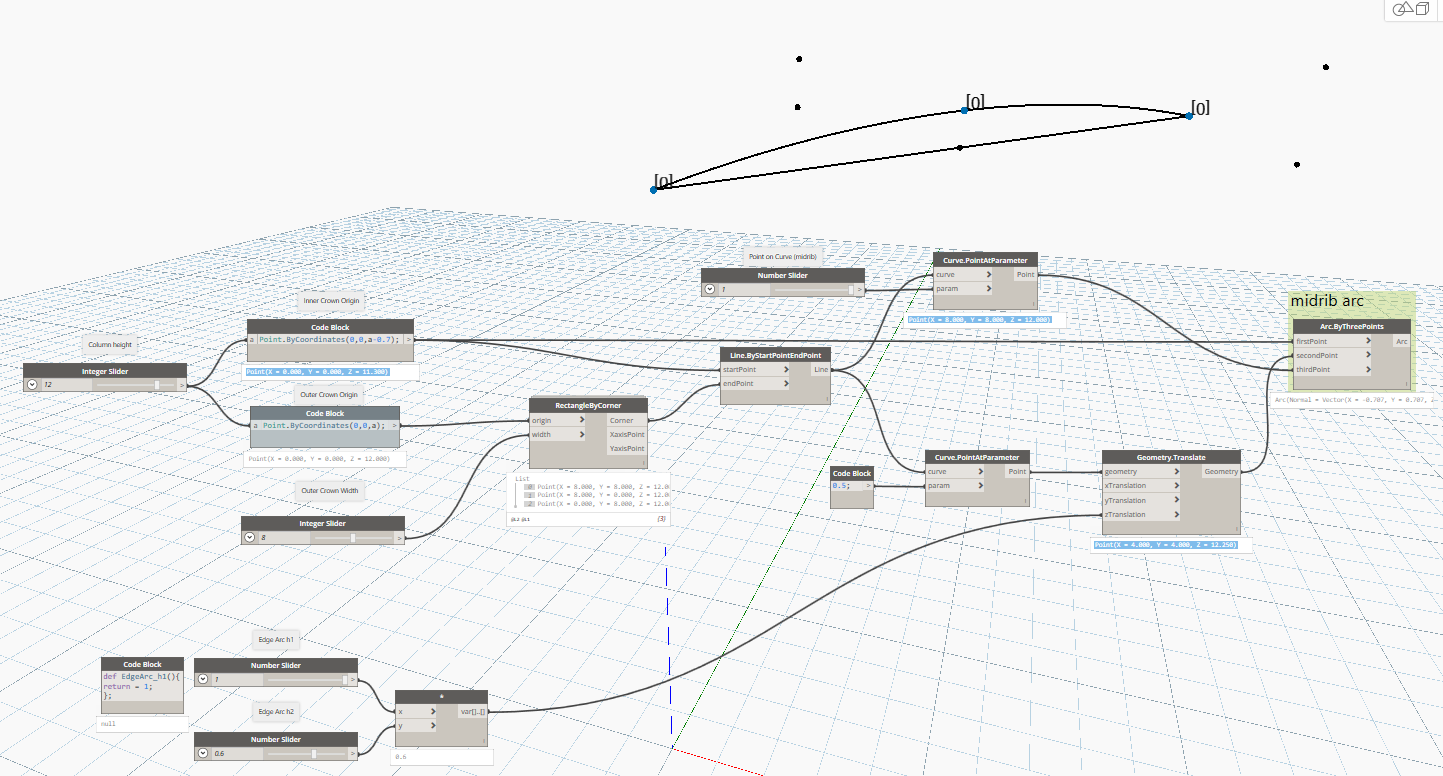
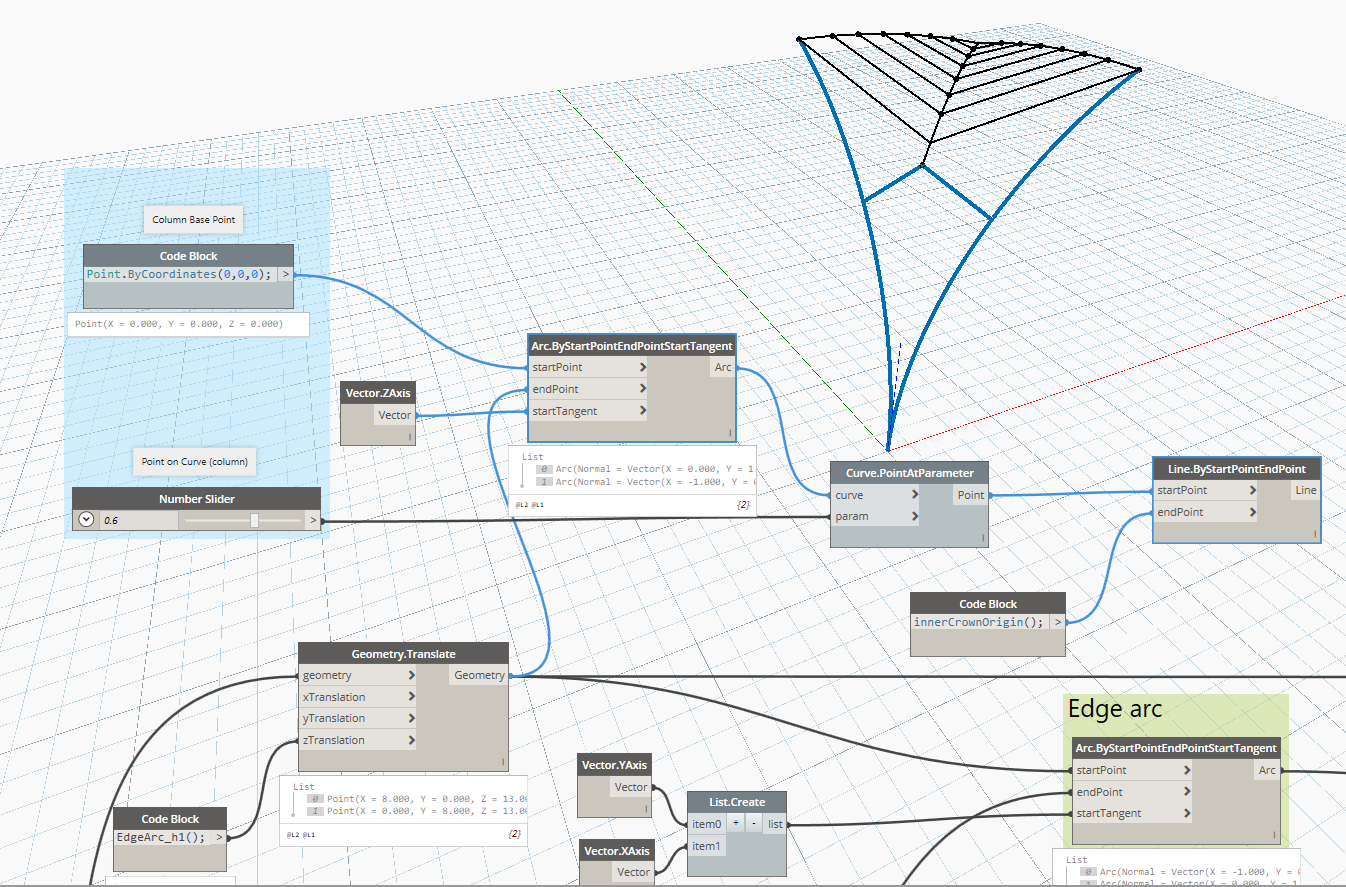
A. Consider ¼ of the crown. On plan, identify the points at the corner and on the axes of symmetry.
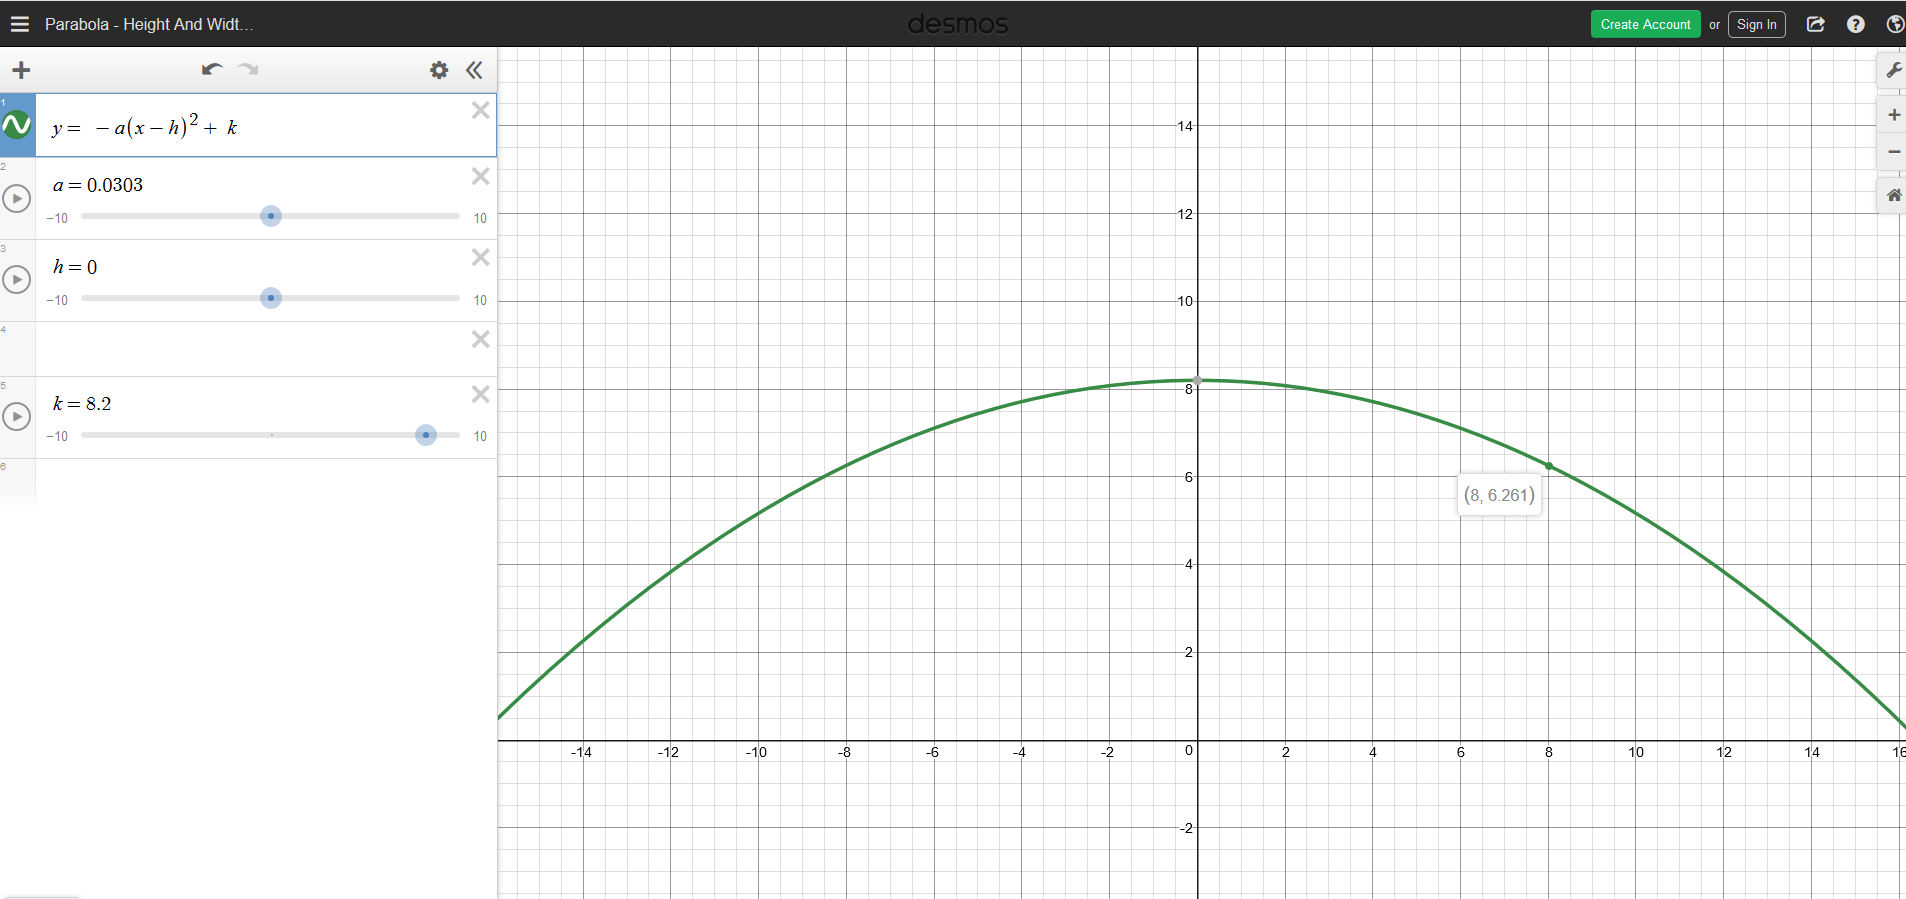
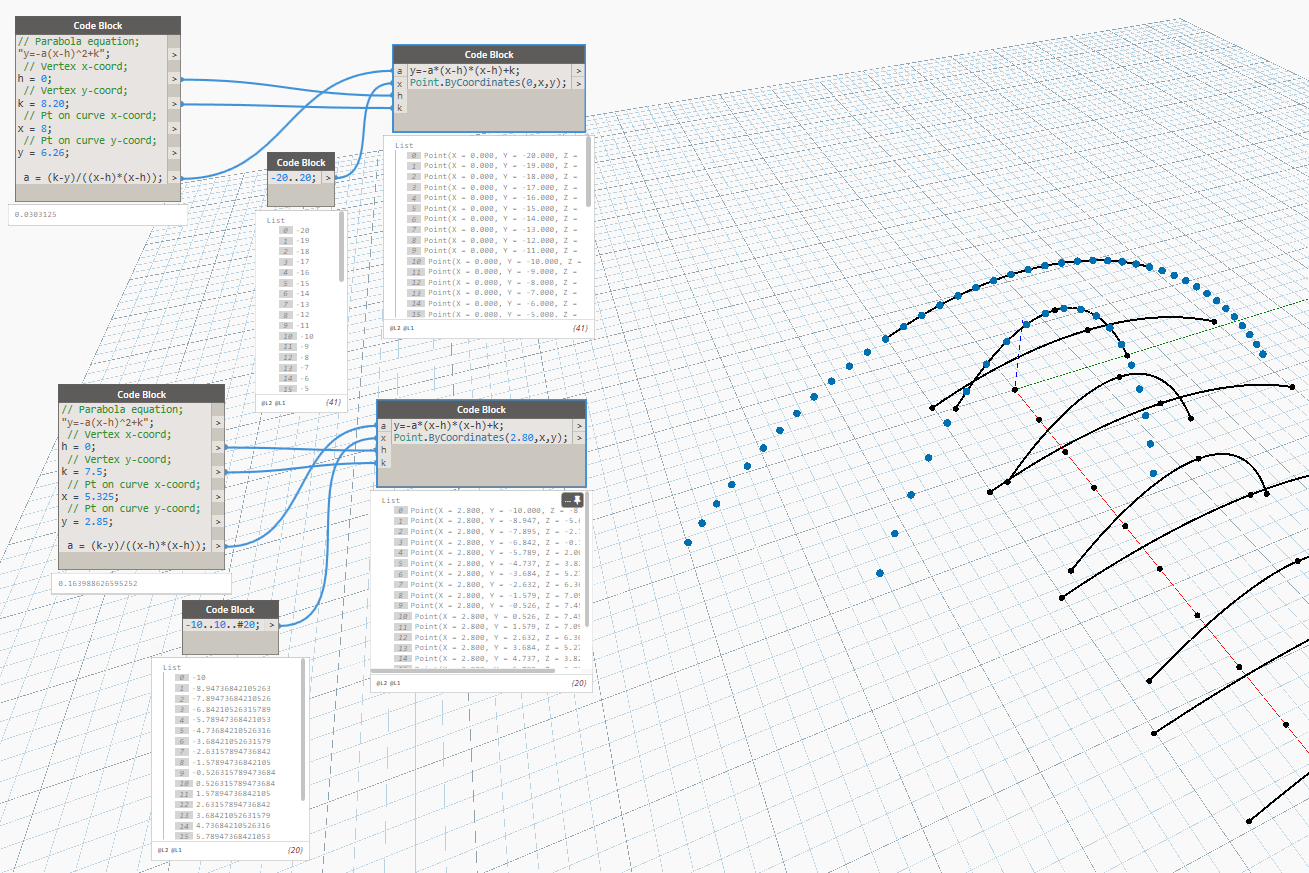
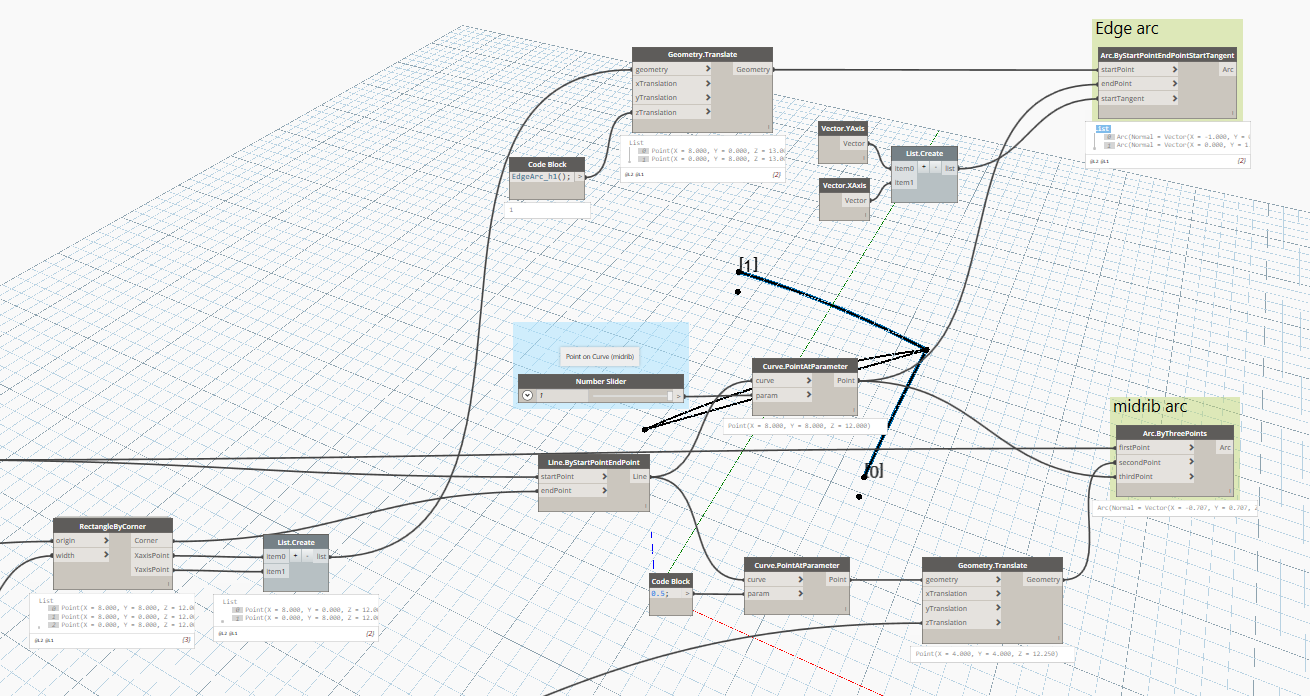
B. Draw a line from the crown centre point to the edge corner. Find the mid-point and translate it vertically. Create an arc by three points with crown centre point, arc mid-point raised and a parameter on the line.
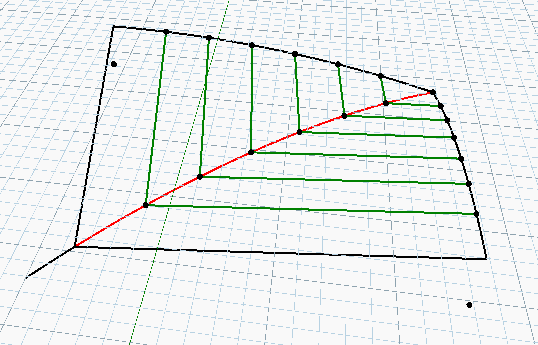
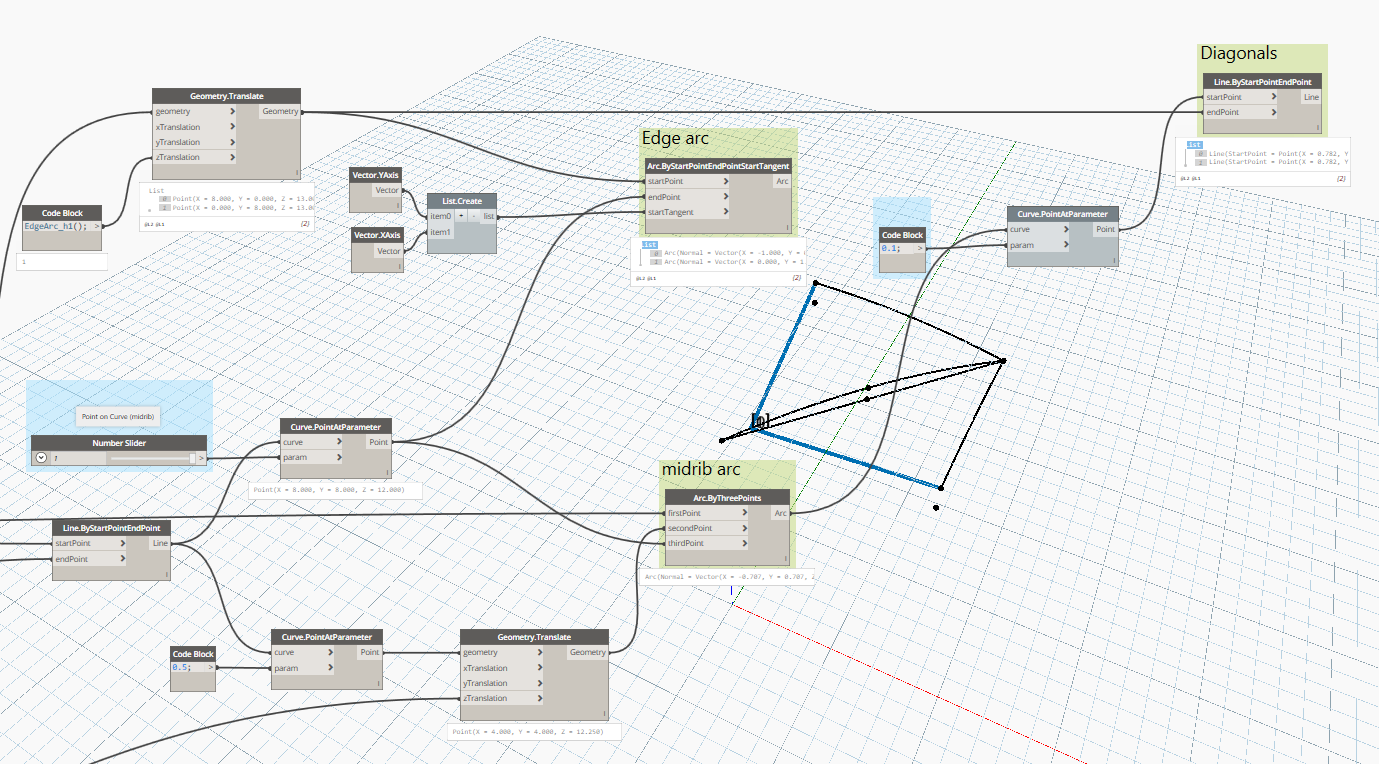
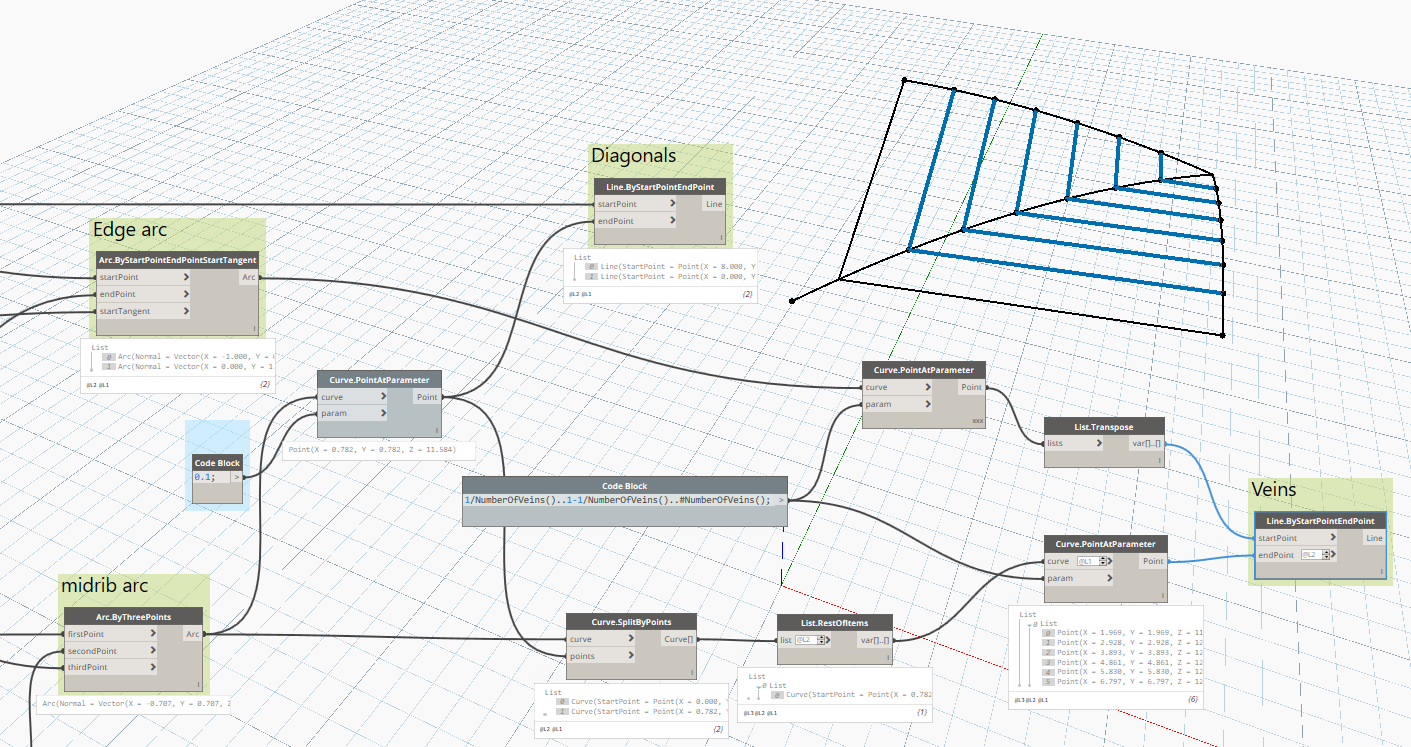
C. Create the edge arcs by start and end point and tangent at start. Create half of the primary beams.
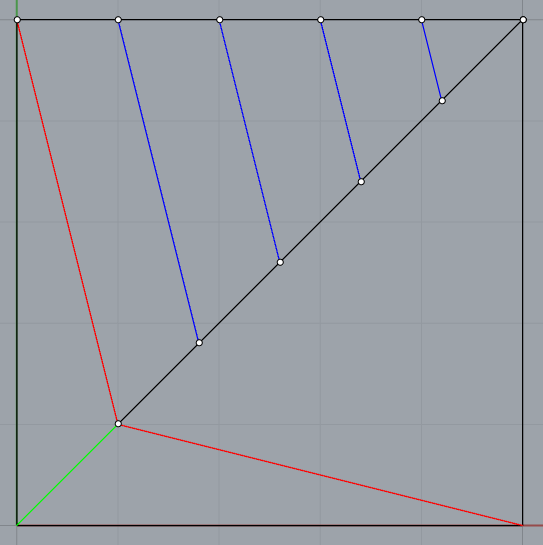
D. Split the rib at the intersection with the primary beams. Divide the rib and the edge arches in 7 segments and create the secondary beams supporting the finishes.
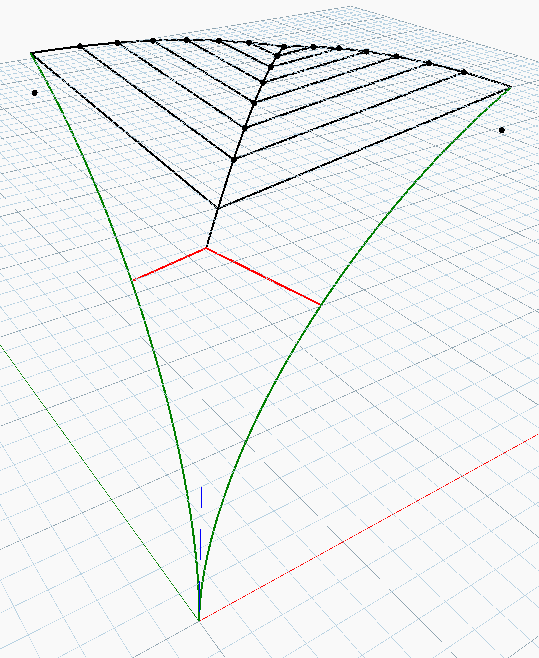
E. Create the columns and the branches and connect them to the primary beams and the crown centre point respectively.
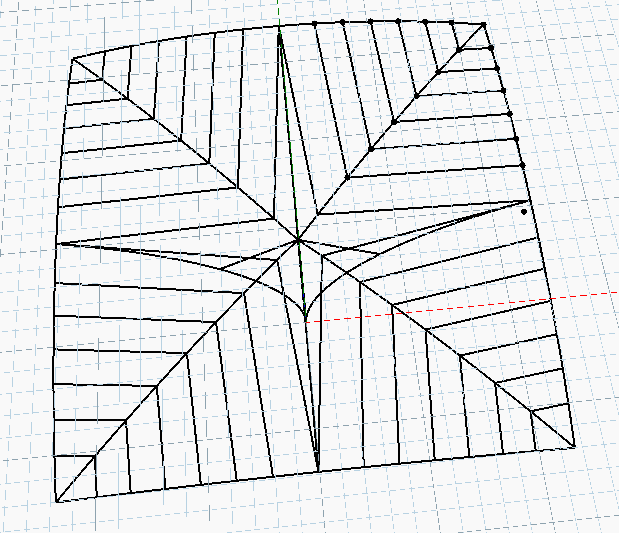
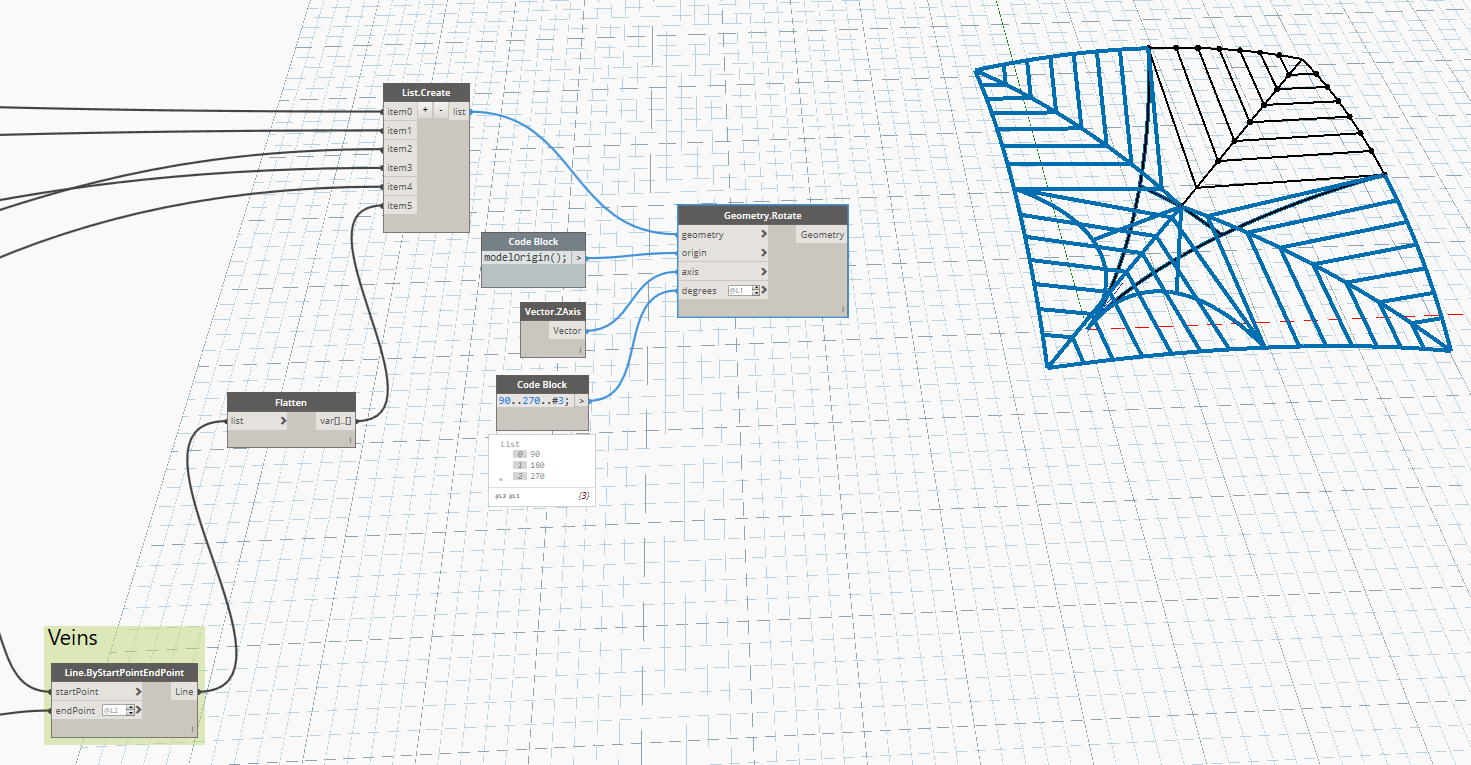
F. Mirror the geometry to complete the model.
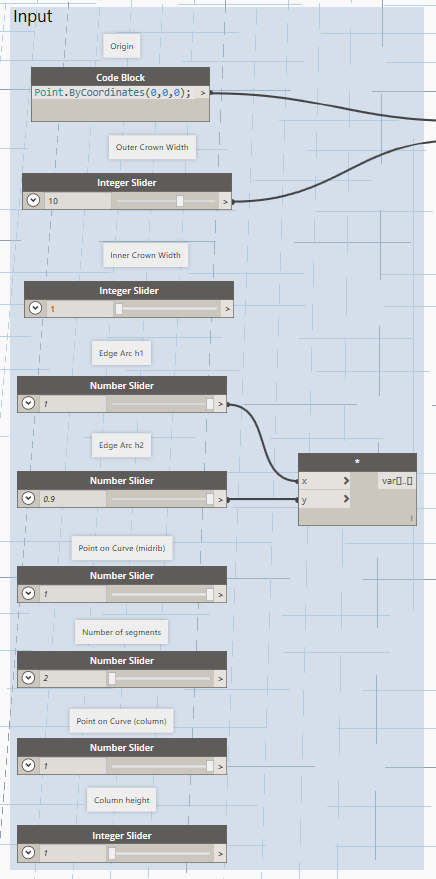
3. Inputs
After breaking down the workflow in single steps we can identify the inputs required:
4. The script
A
Note: the order of creation of the inputs in the custom node determines the order in which they appear on the node.
B
C1
C2
D
E
F
G
Example #2
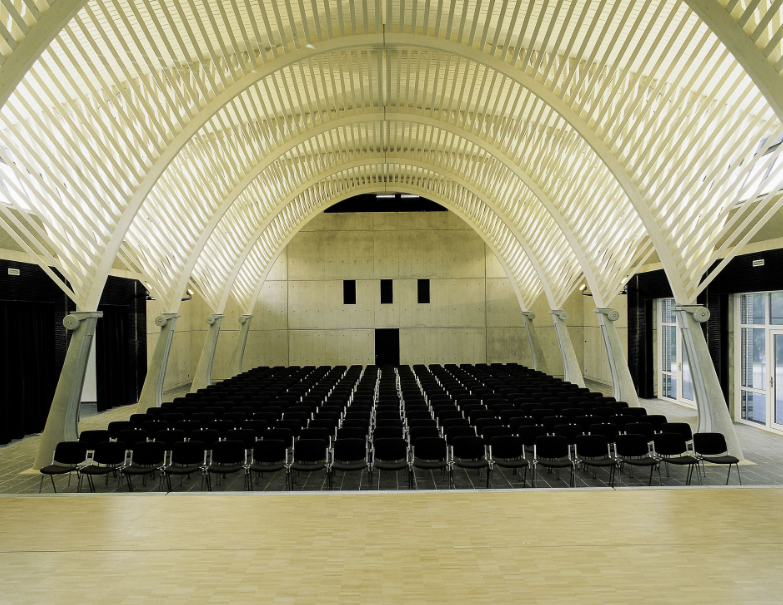
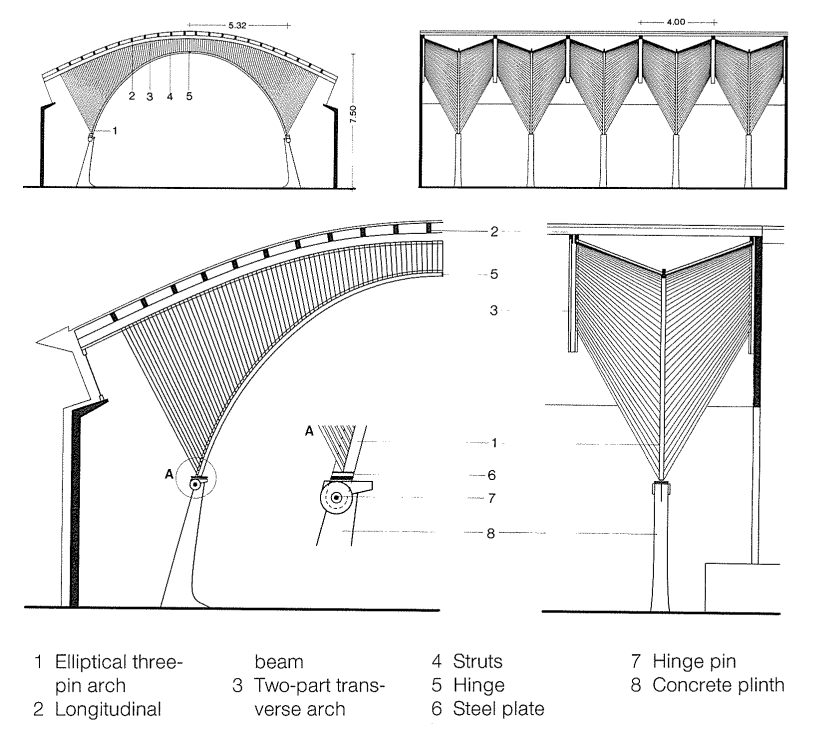
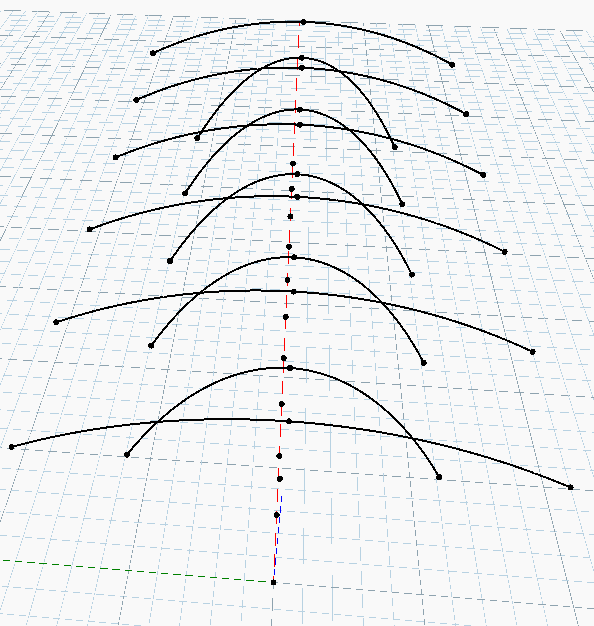
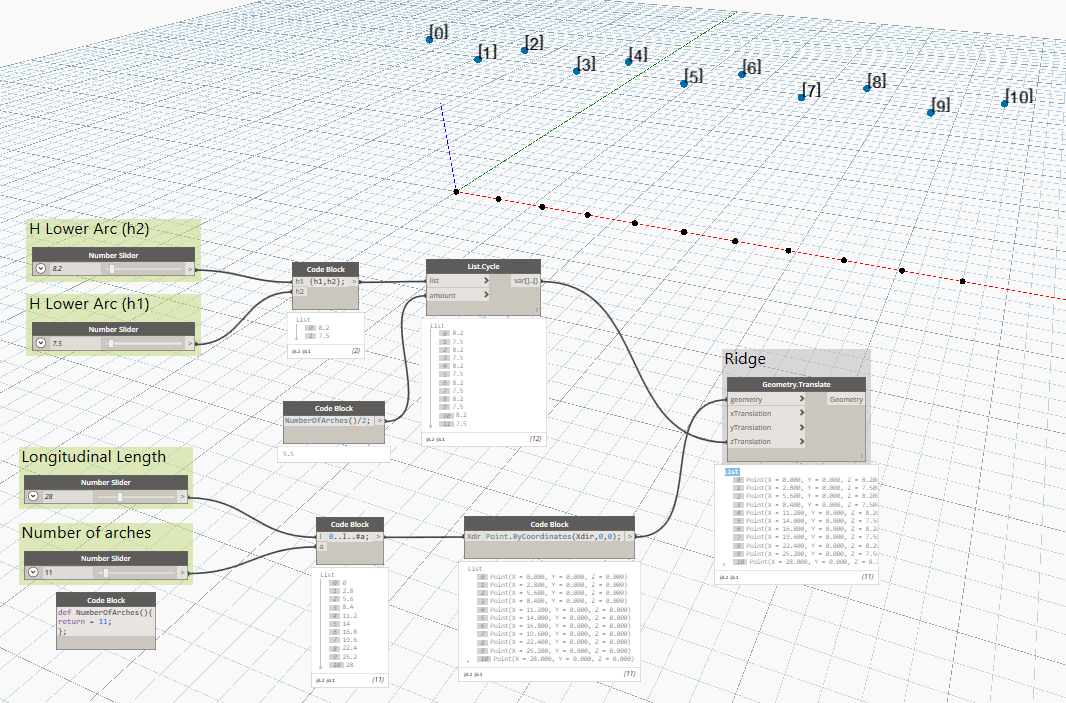
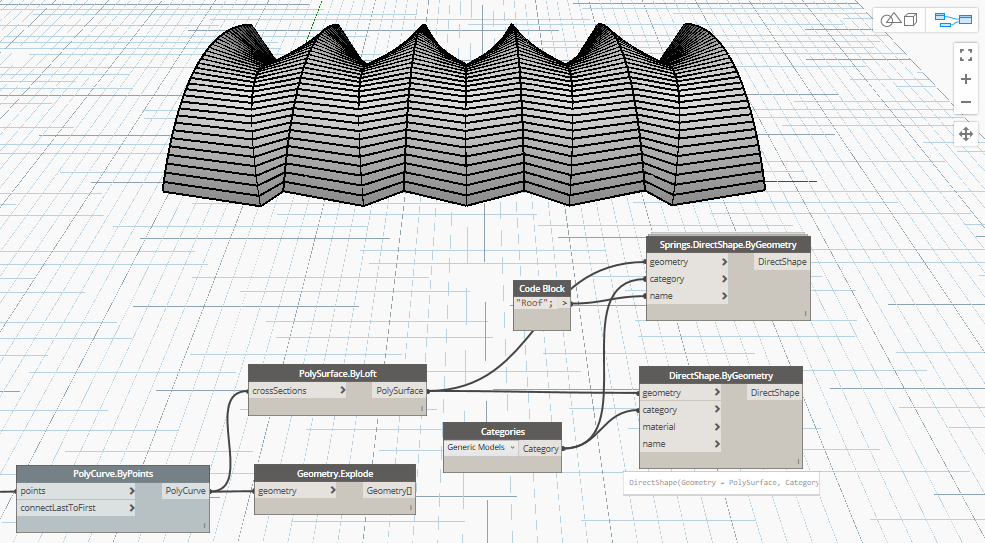
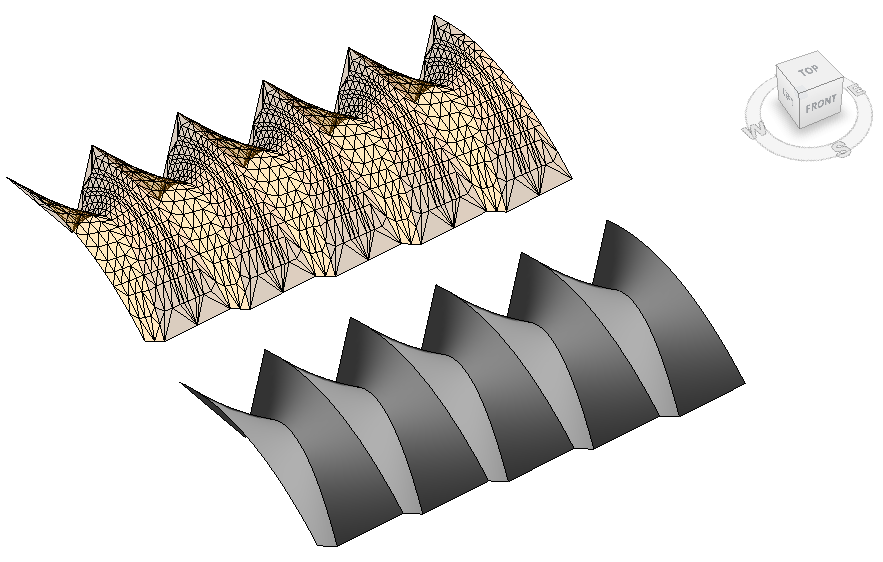
The Assembly Hall in the Wohlen high school is a 16m x 28m rectangular space covered by 5 prefabricated 3 pins arches spanning 8m. They have the form of a deep triangular section with 1 parabolic arc defining the bottom chord and 2 segmental arches forming the top chords. The height of the lower arc is 7.5m above ground and 10.65m wide. The upper arcs are 70cm higher at the mid-point and 9.40m height at the impost and 16m wide.
Topics
- Understand the geometry and establish workflow
- Element Repetition and Orientation
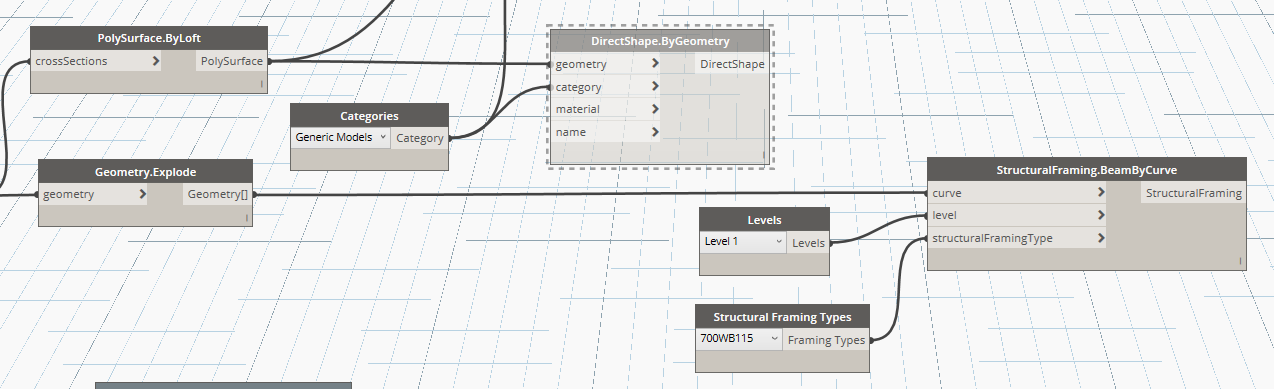
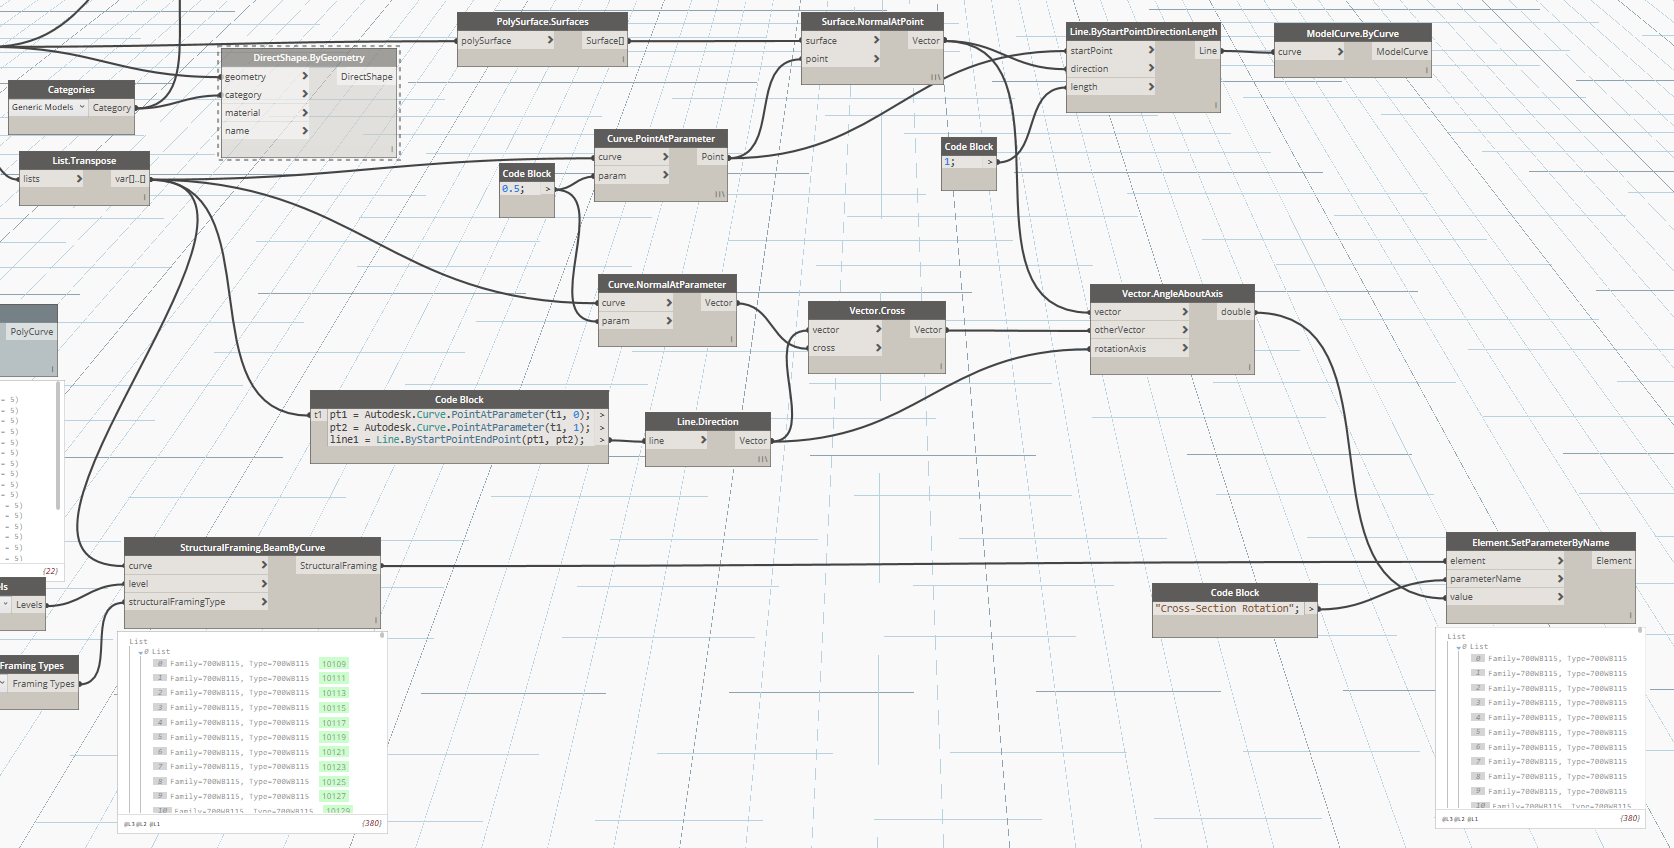
- Nurbs, DirectShape
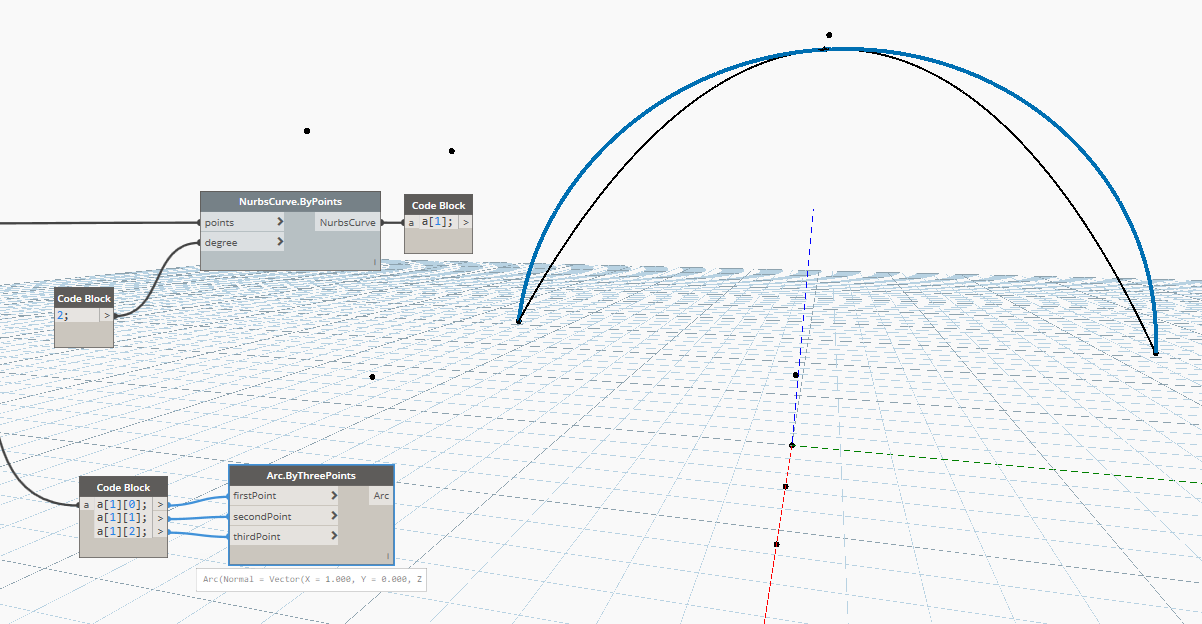
1. The basic elements: arc and ellipse
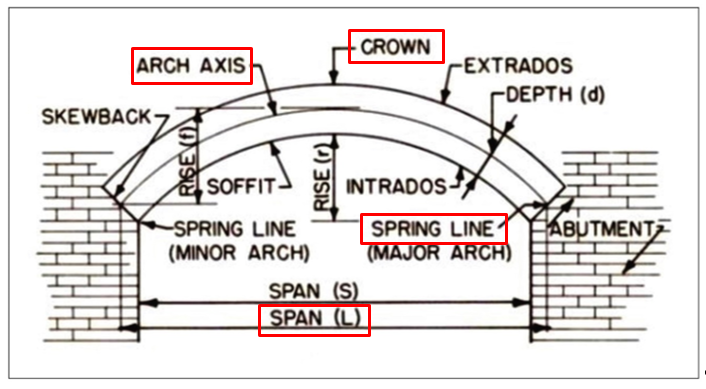
Vocabulary
2. Workflow
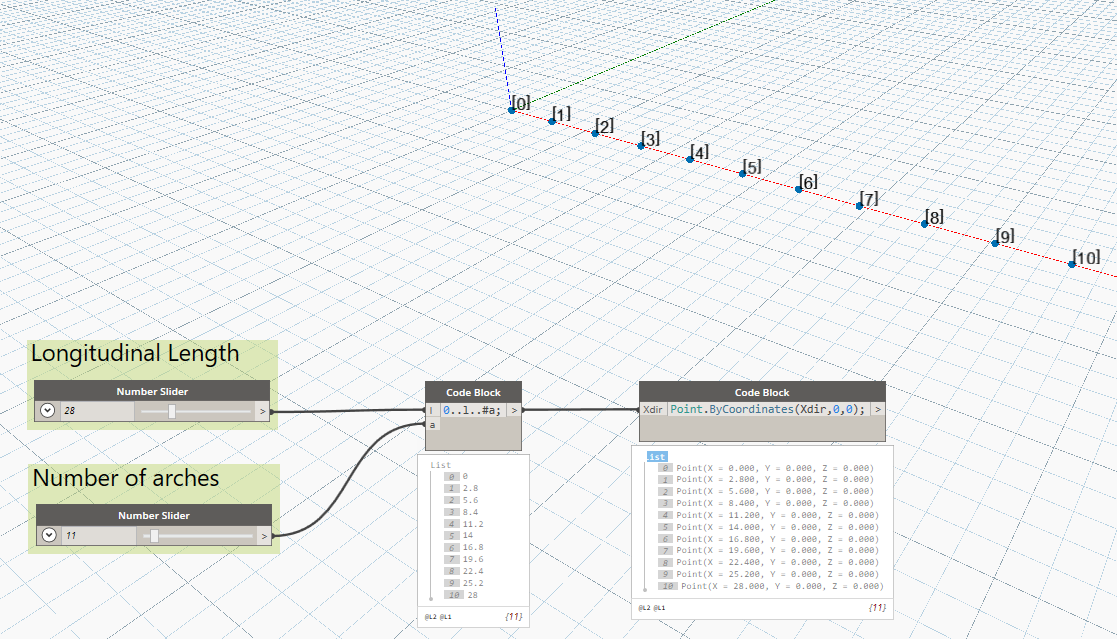
A. Create a point for each arch on the XY plane.
B. Create the springers and the crown set of points.

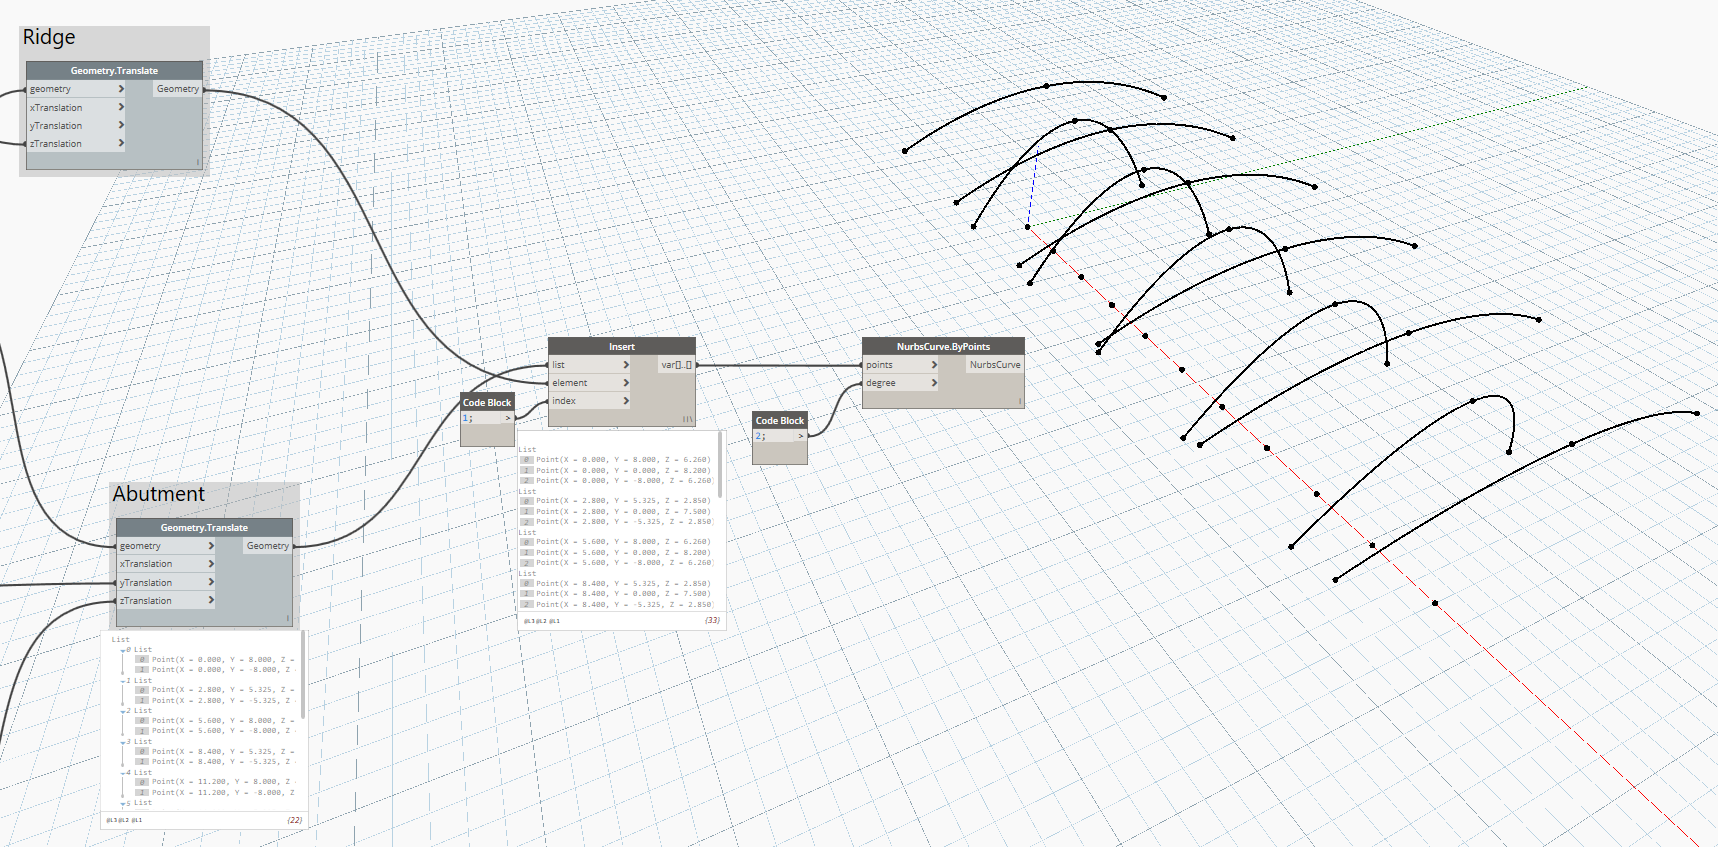
C. Draw the arches by three points
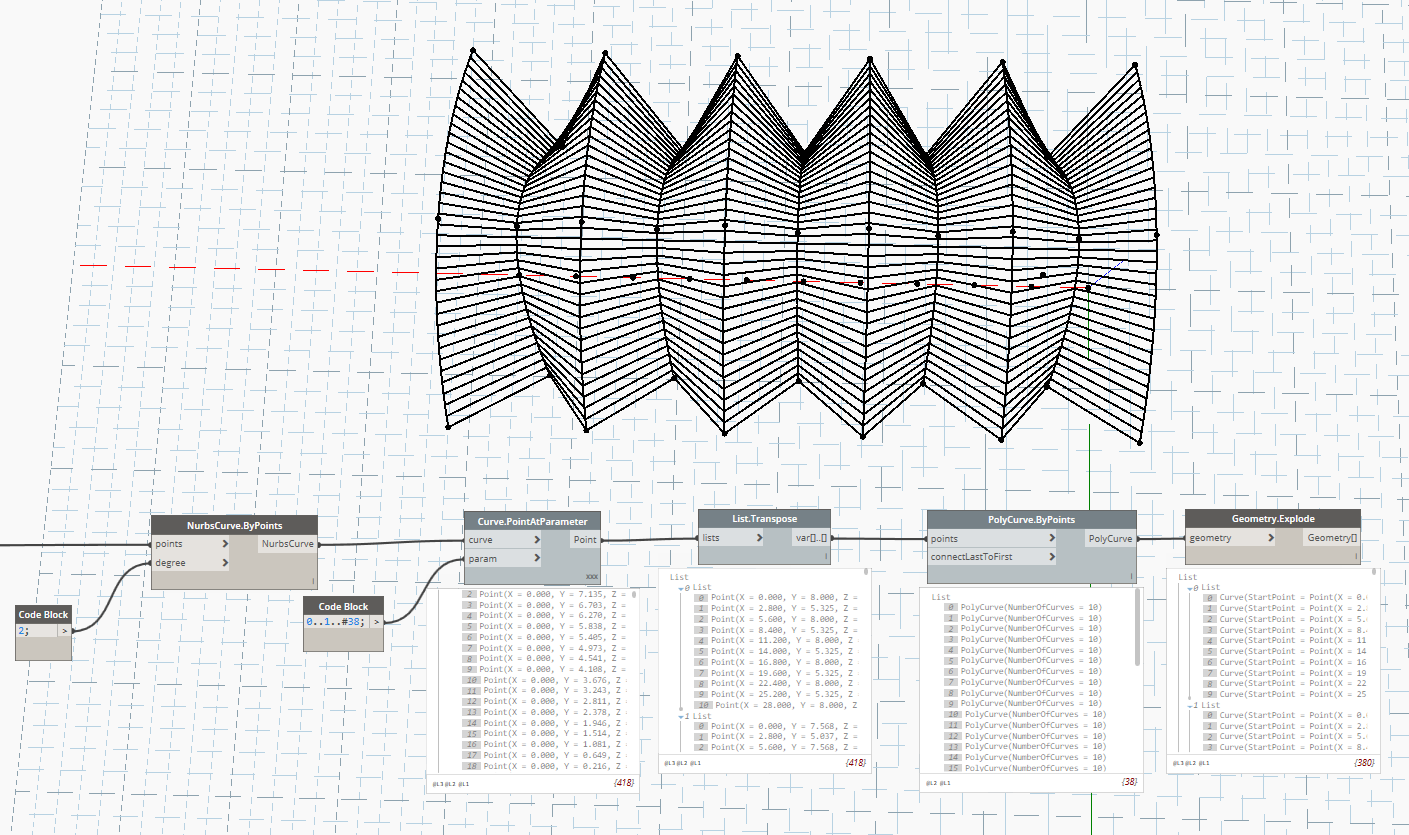
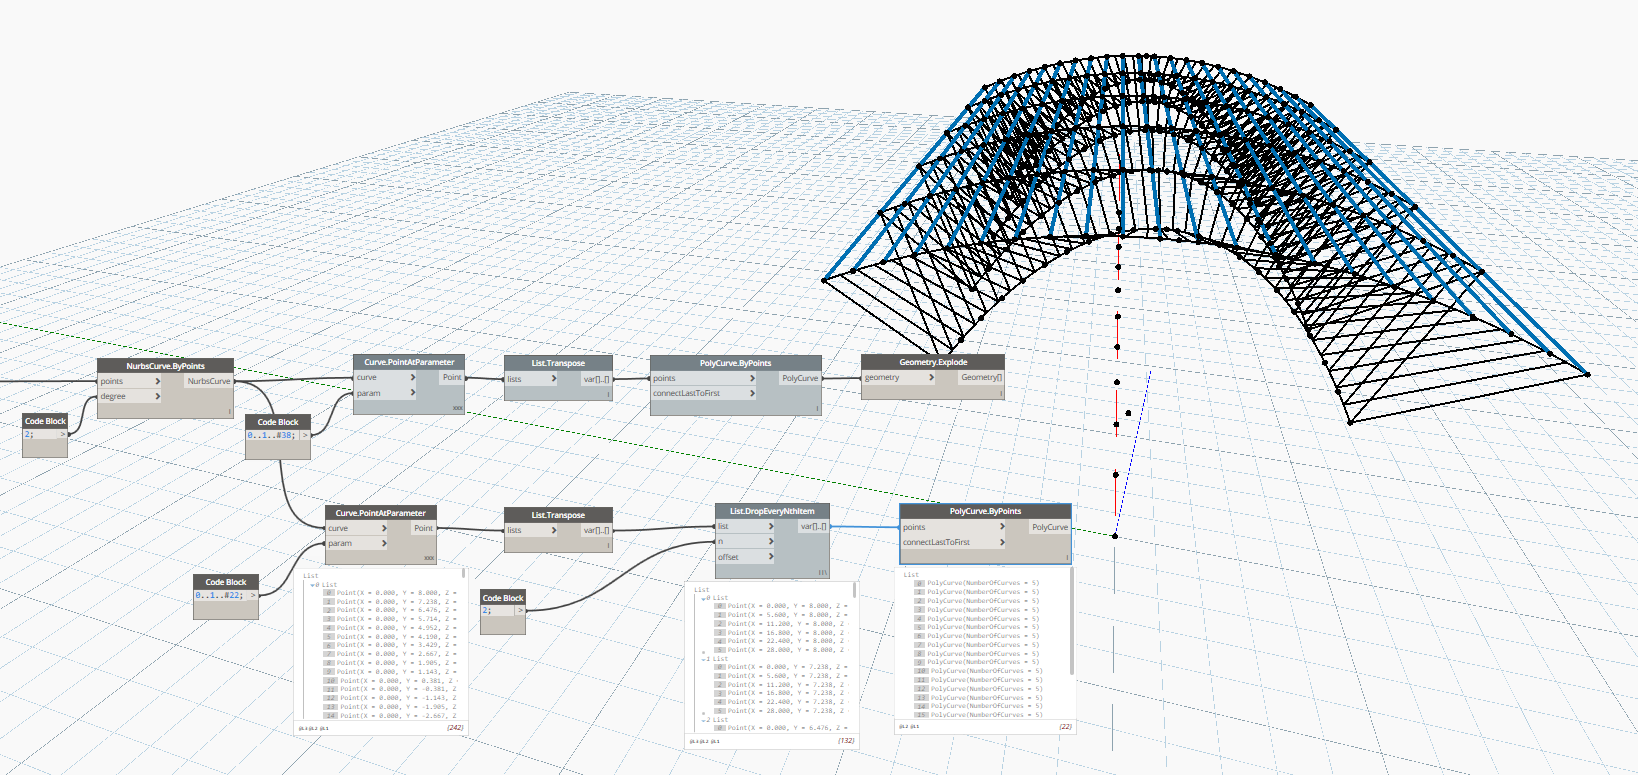
D. Divide the arches and create the vertical struts
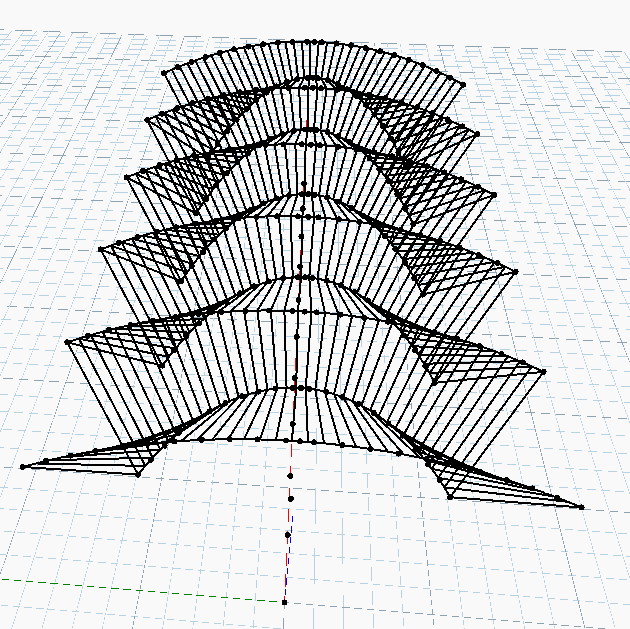
E. Create the top horizontal struts

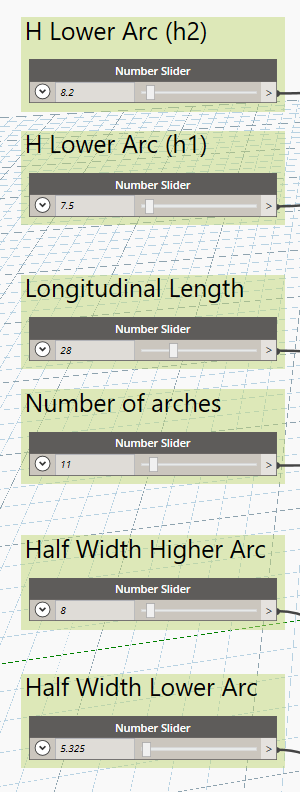
3. Inputs
4. The script
A
B
C

D
E

F
G
H
I

Appendix
-
Increase the render precision from Settings -> Precision: Small; Render: High
-
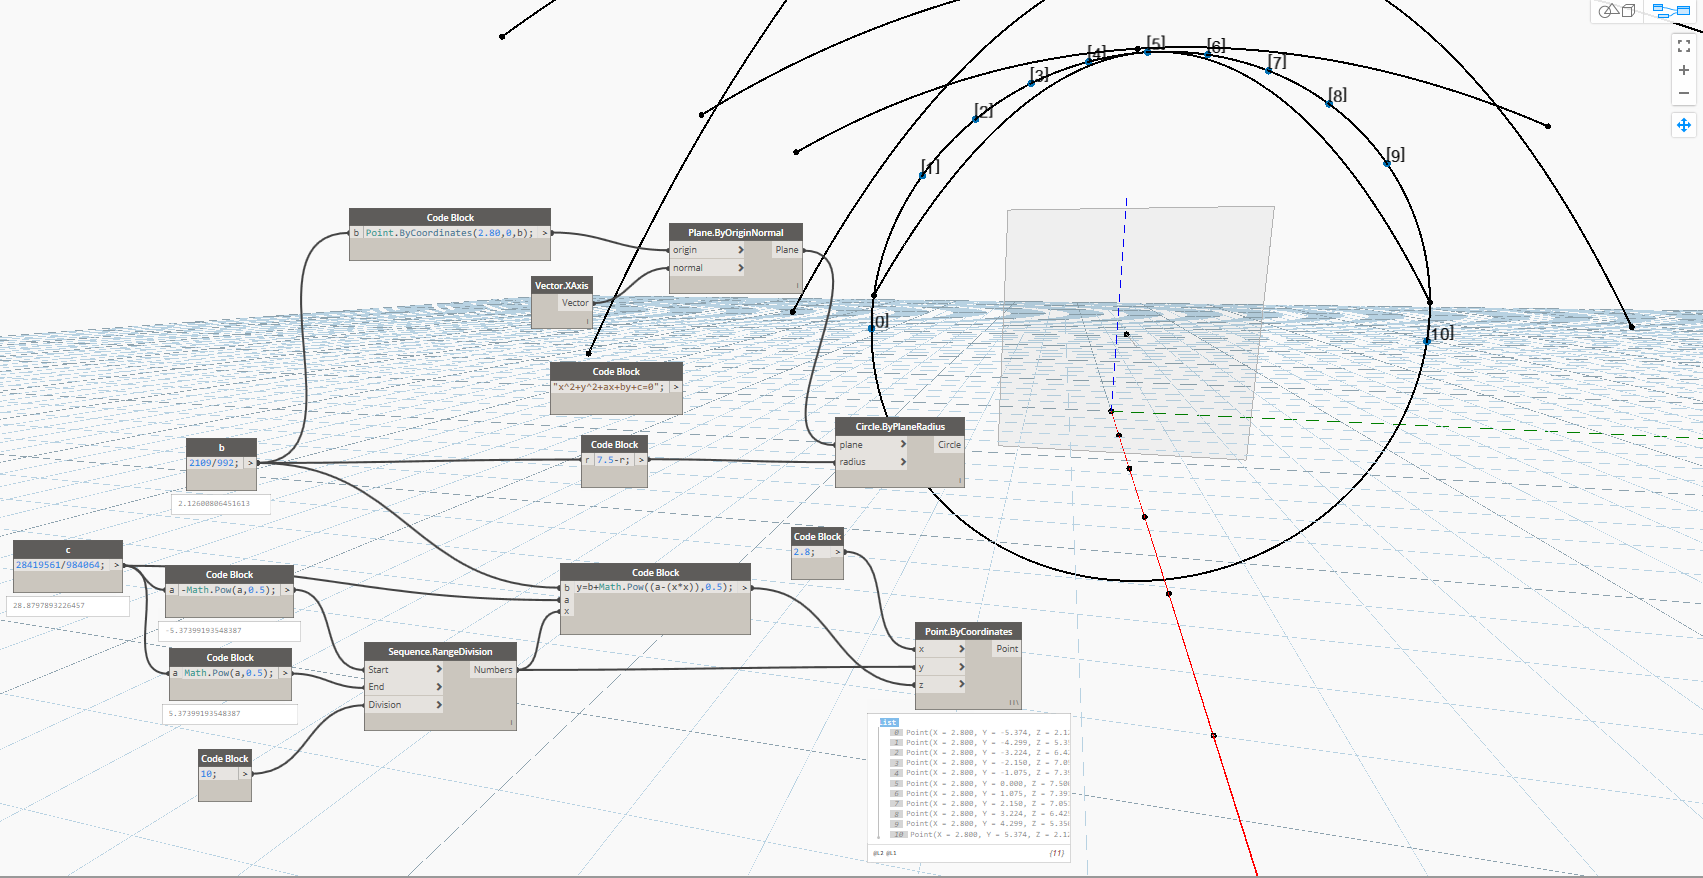
The NURBS formulation permits exact representation of conics, such as parabola, circle and ellipse and hyperbola.
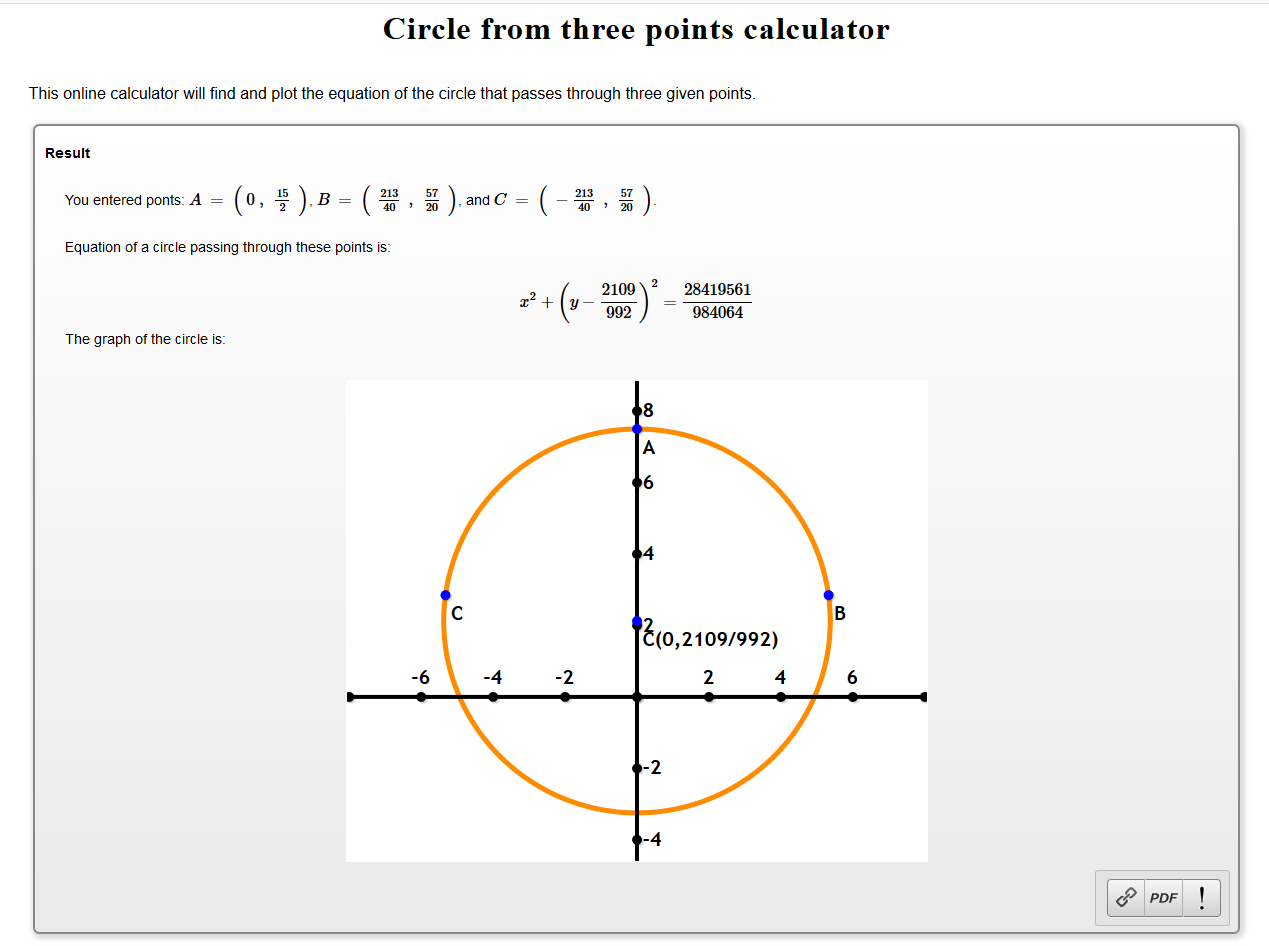
- Online geometry calculator